Using Amplemarket's Sendgrid as your Custom SMTP
Last updated: July 16, 2026
In this guide we’ll walk through having an alternative email sending setup through Amplemarket’s SendGrid infrastructure (using SMTP):
Setup your account in SendGrid
Authenticate your Domains
Link your SendGrid account to your Amplemarket’s Mailboxes
Important Considerations
Before implementing this setup, be aware of these workflow changes:
Emails won't appear in your Outlook "Sent" folder: Because emails are sent directly through SendGrid's optimized servers, they bypass your personal mailbox's "Sent" folder. However, all your sending activity, replies, and engagement are still tracked within Amplemarket.
Different failure visibility: SendGrid has an extremely high success rate for sending. In the rare case of a sending failure, the alerts work differently than standard bounce messages, but this is a small trade-off for the massive gain in reliability and deliverability.
1) Setup your account in Sendgrid
After Amplemarket provides your credentials to access your SendGrid account, you'll need to make your first login into Sendgrid - https://login.sendgrid.com/login/password
Setup a 2FA authentication, and then you'll be able to log in.
2) Authenticate your Domains
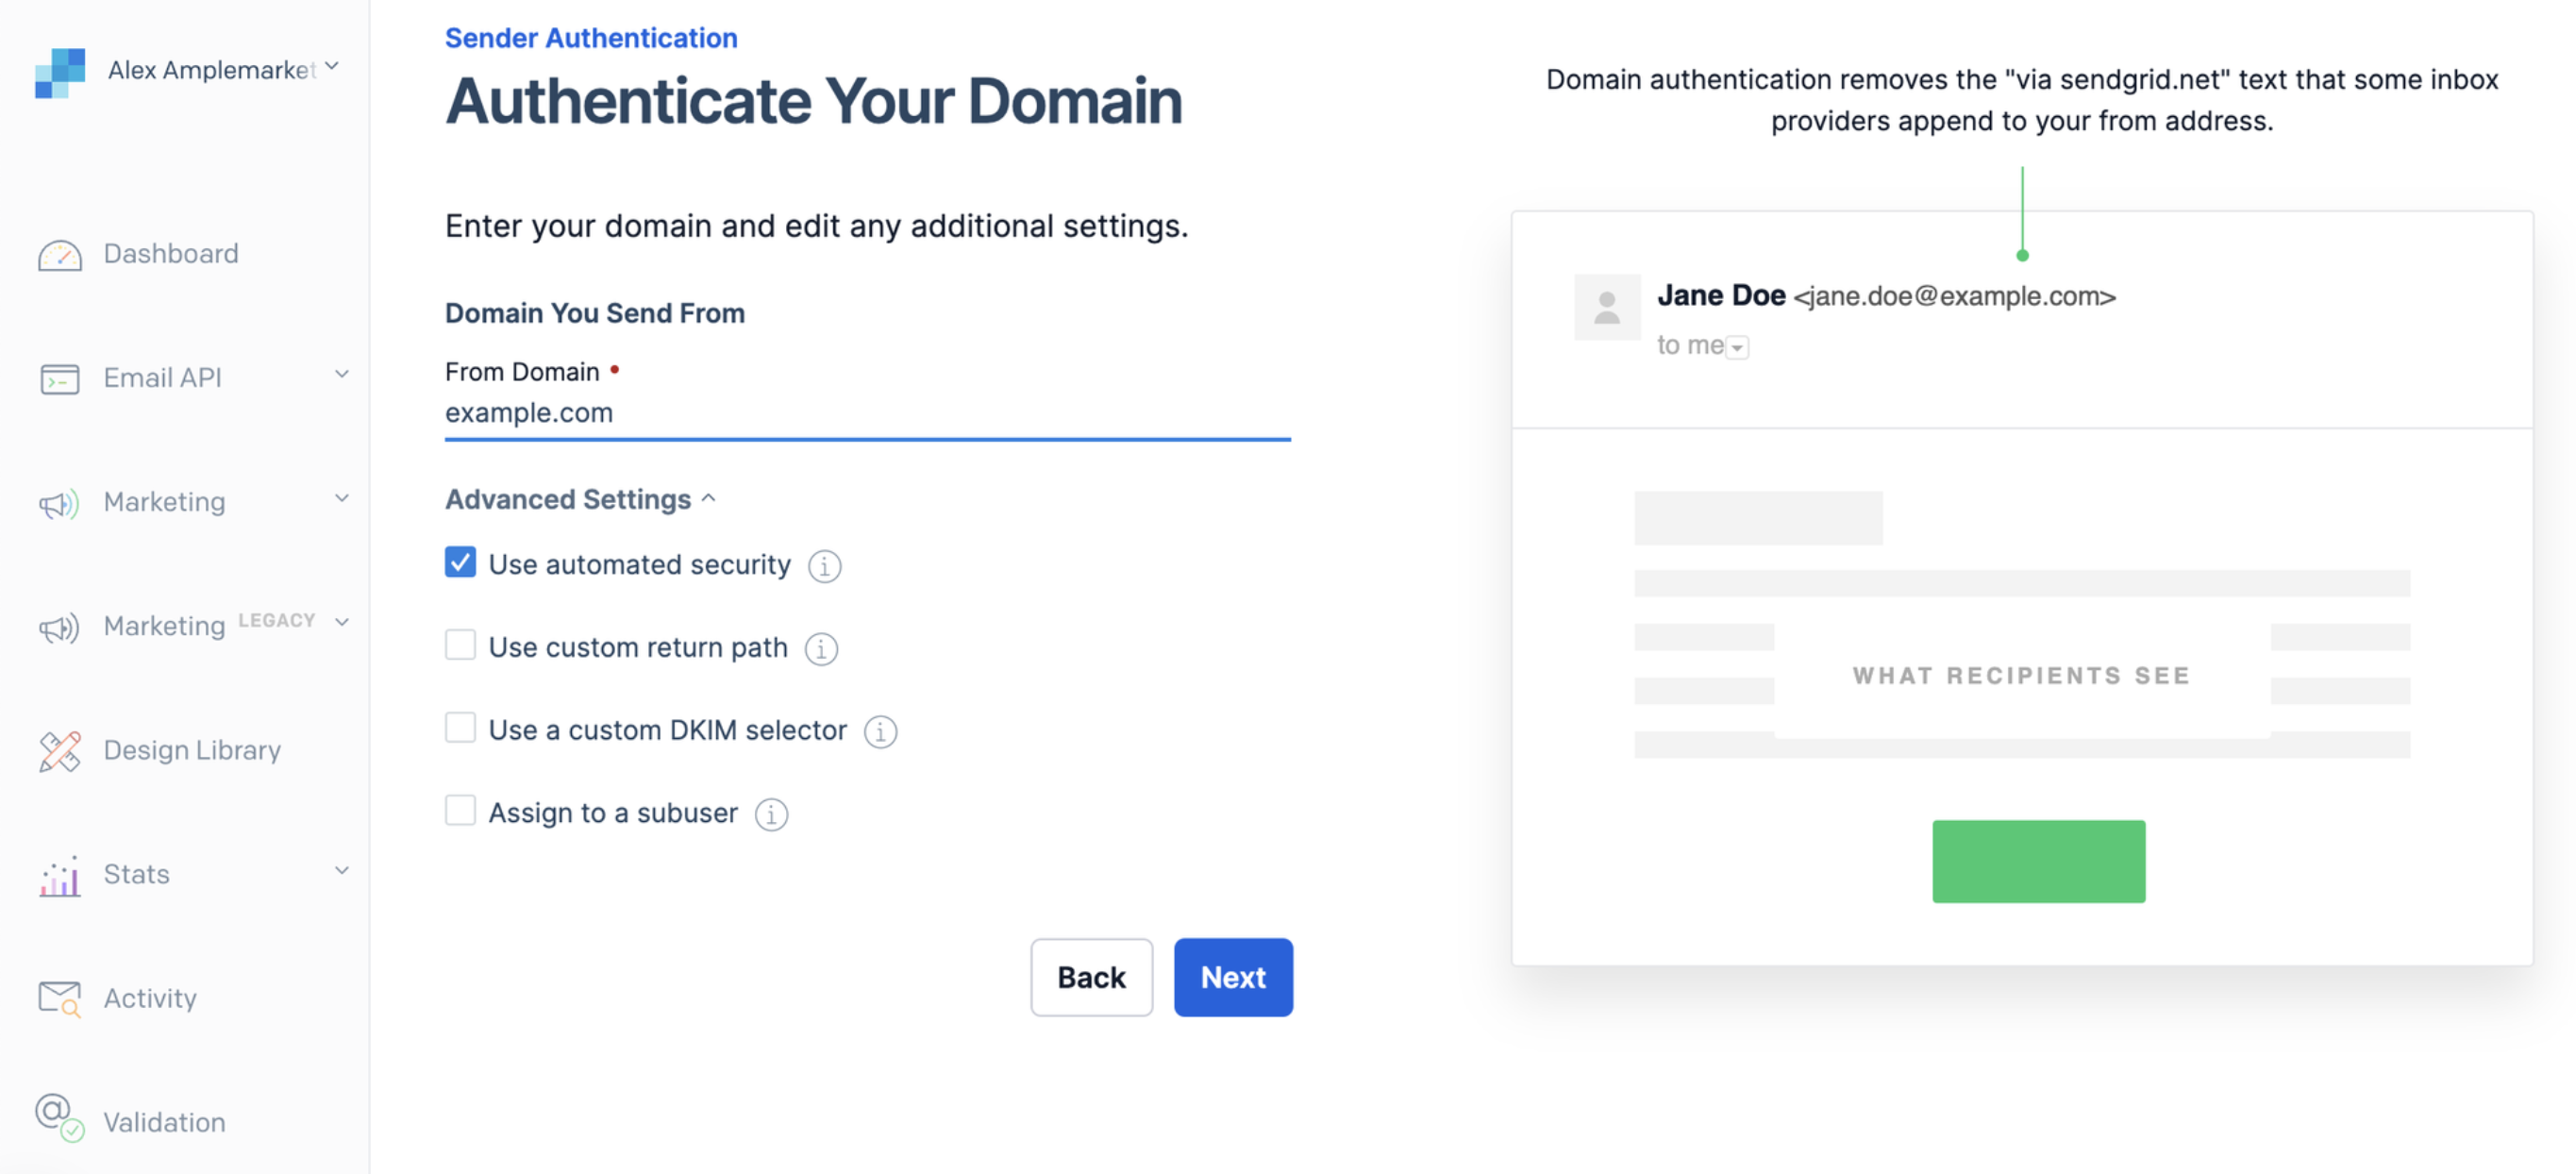
This step will allow us to send emails through our SendGrid infrastructure but they still show up in the recipients mailbox as though they came directly from you.
If you want to send emails from a mailbox using Amplemarket's SendGrid as your custom SMTP, you must first make sure you’ve completed this step for the domain of that mailbox.
You’ll have to repeat this step independently for each domain, in general the steps boil down to:
Pick a domain
If your domain is hosted in GoDaddy, you’ll be able to perform an automated setup, otherwise it will be manual.
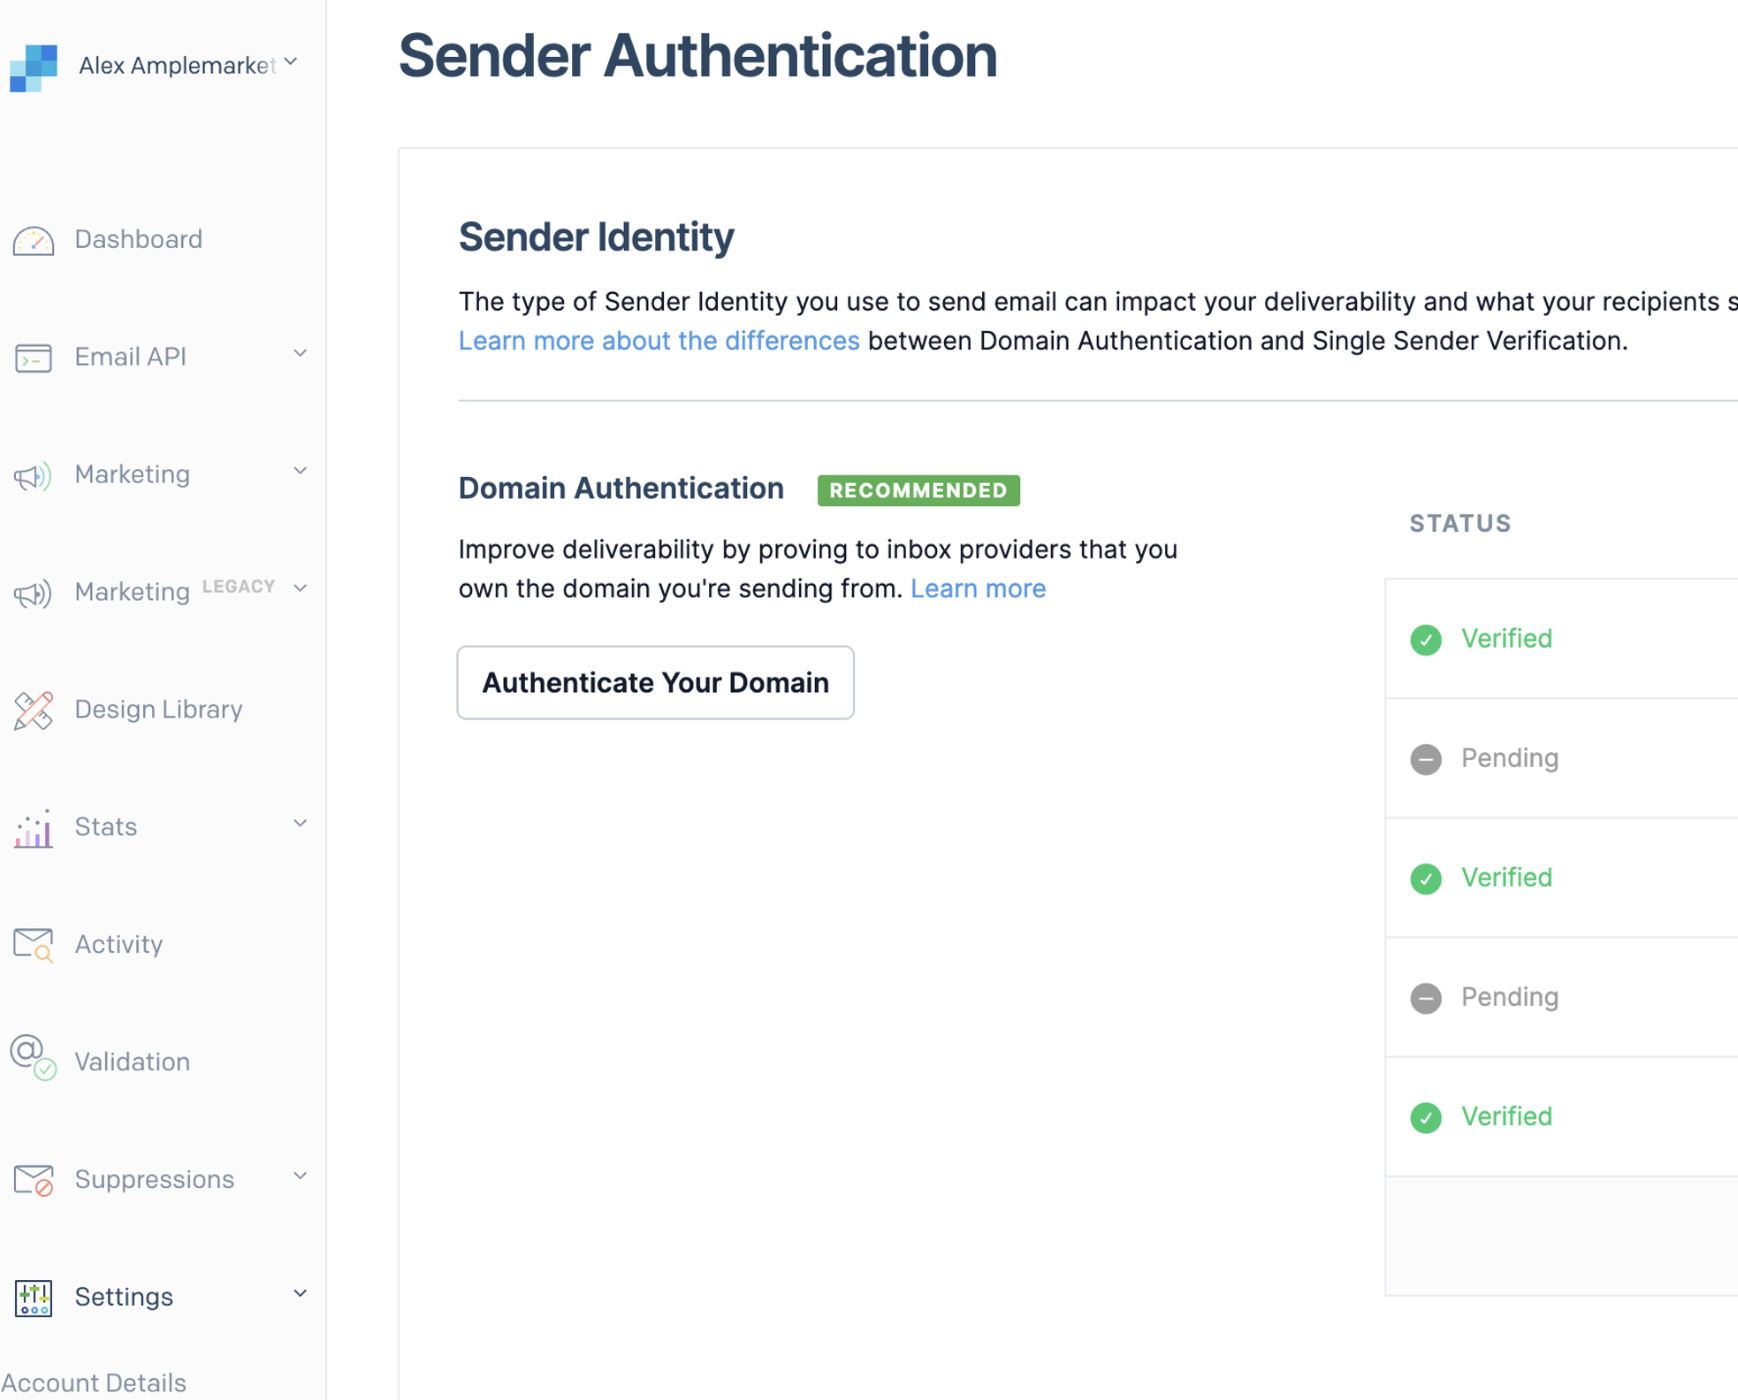
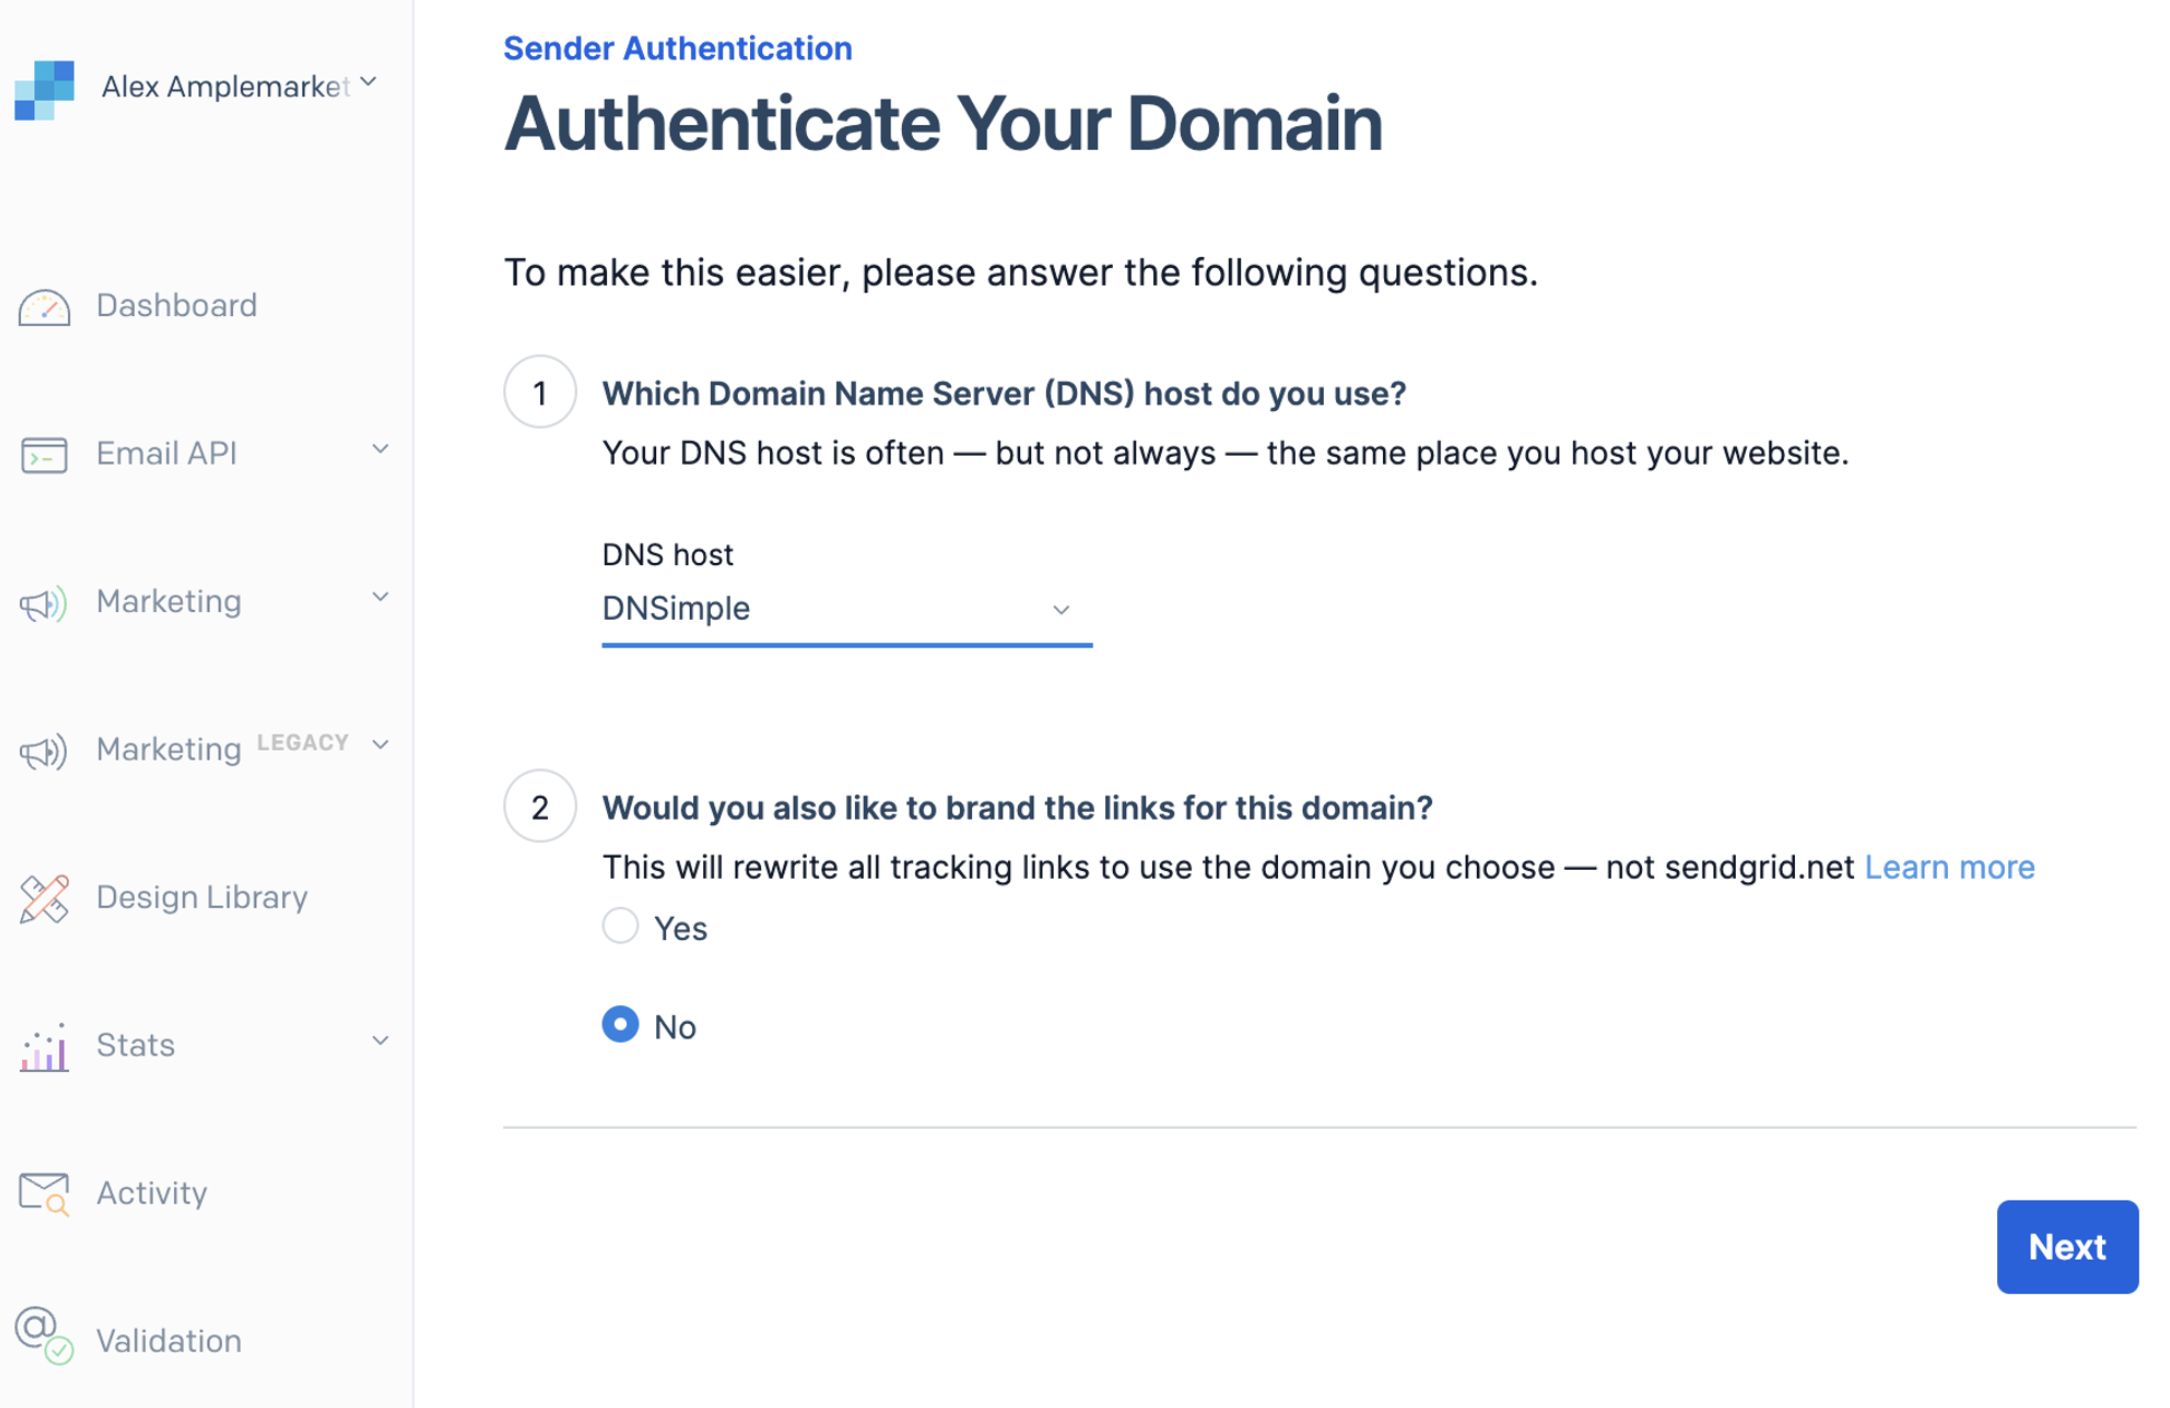
Insert the domain into SendGrid
SendGrid generates several DNS records
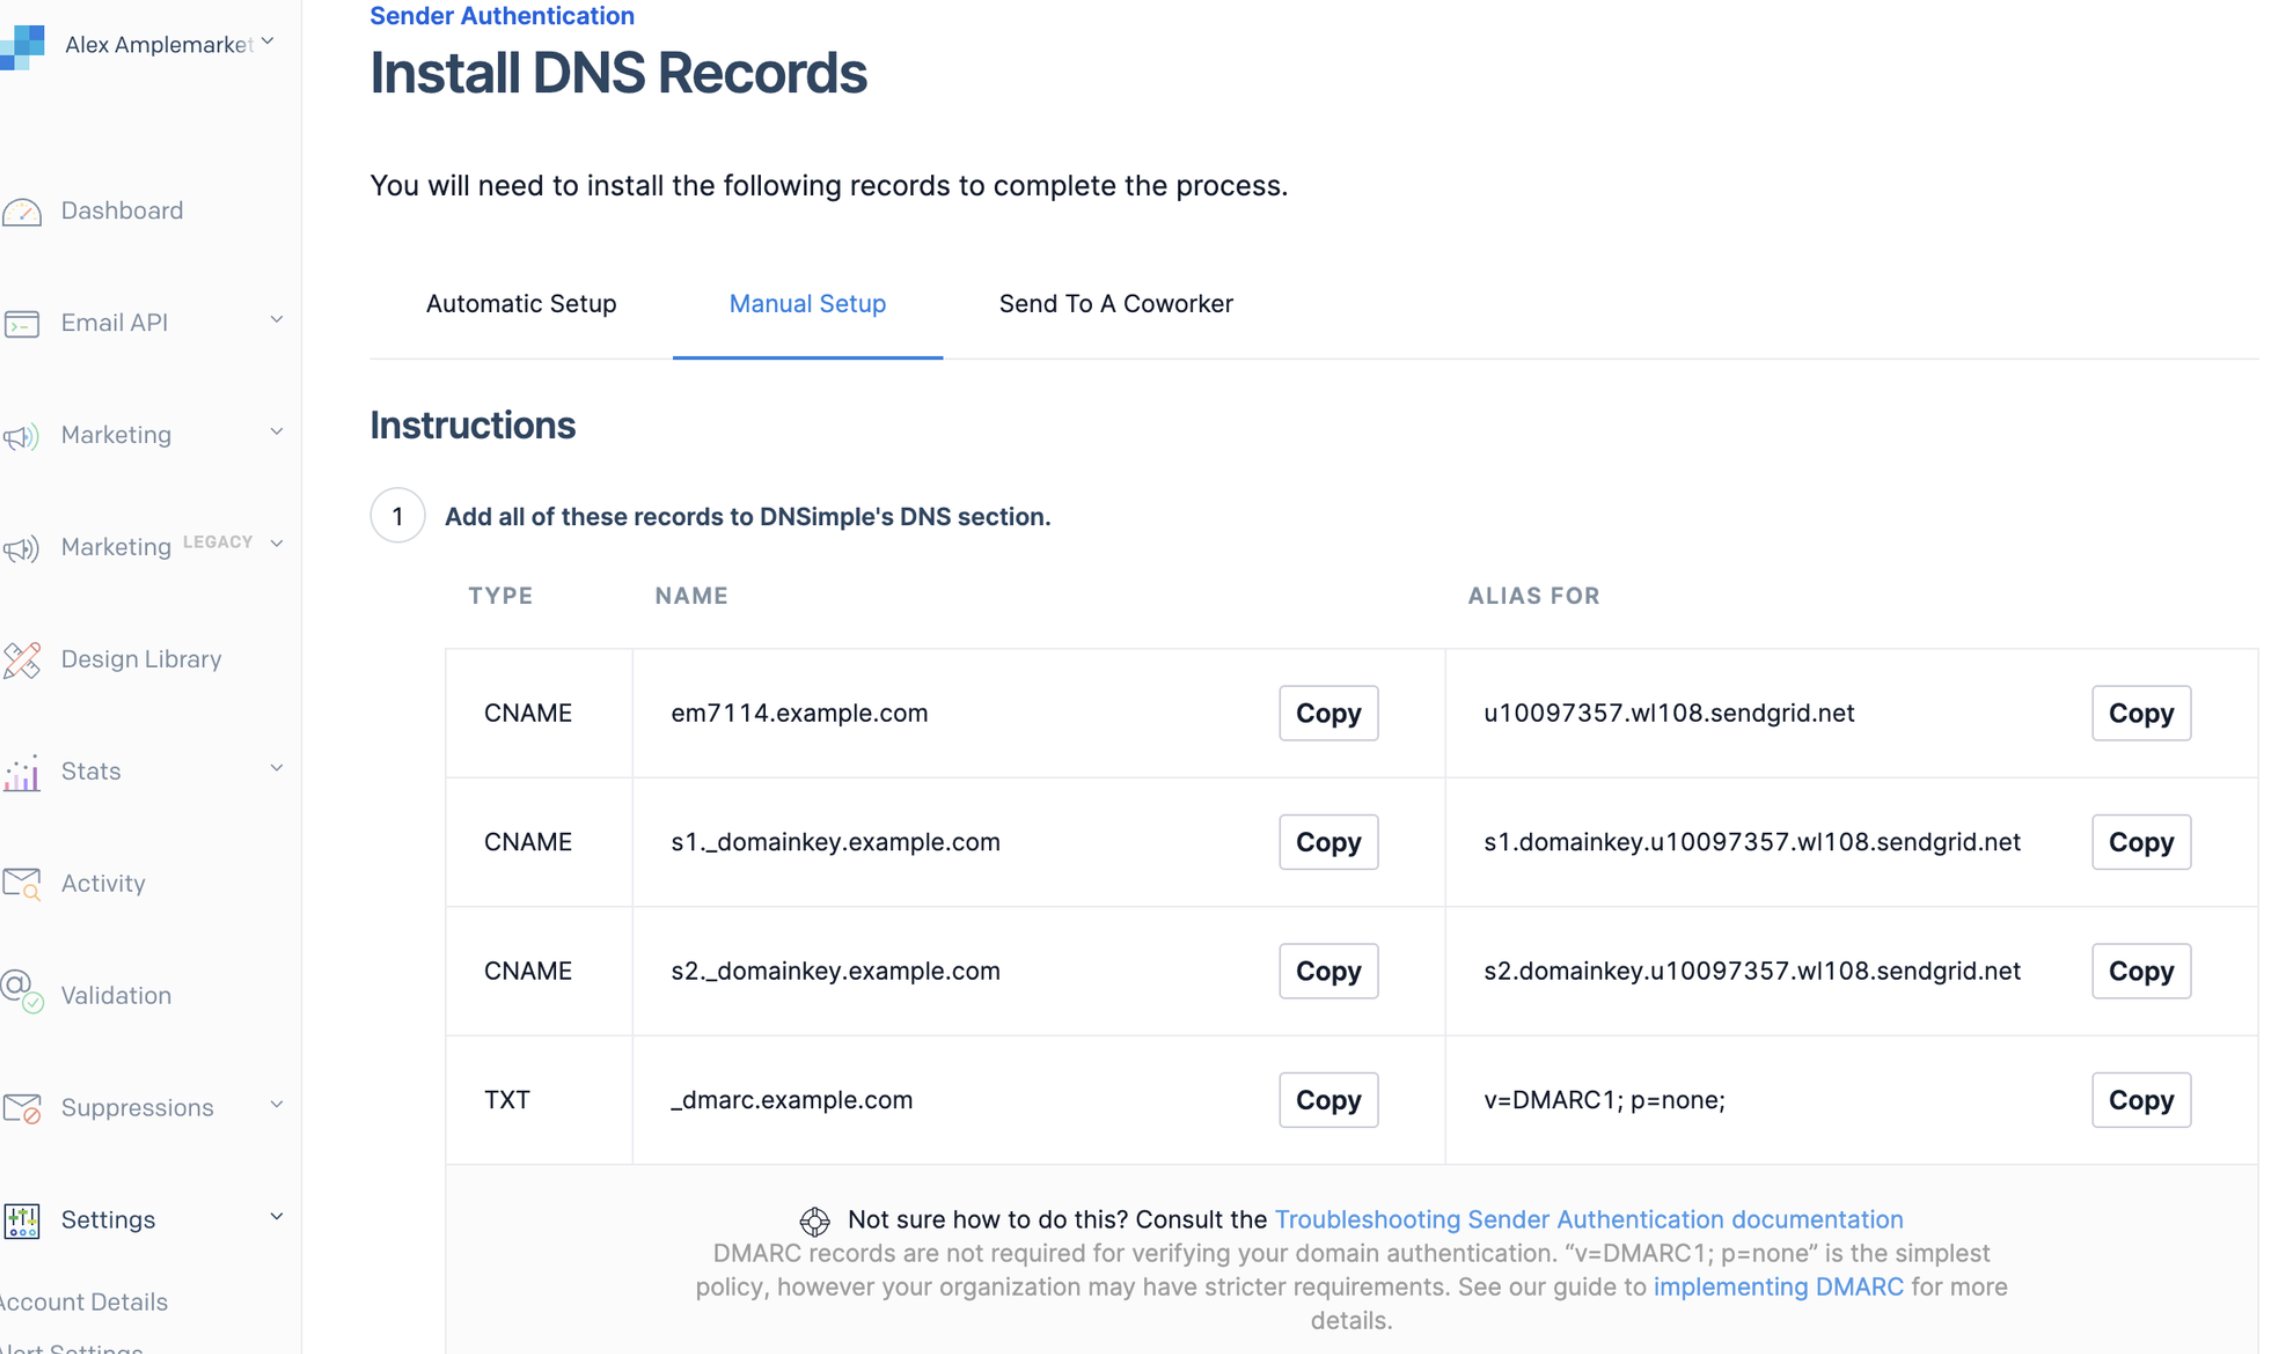
Go into your DNS provider to add these records for the domain you’ve chosen
Go back to SendGrid and press the verify button to validate setup was done correctly

You can find the specific step-by-step guide in SendGrid’s documentation:
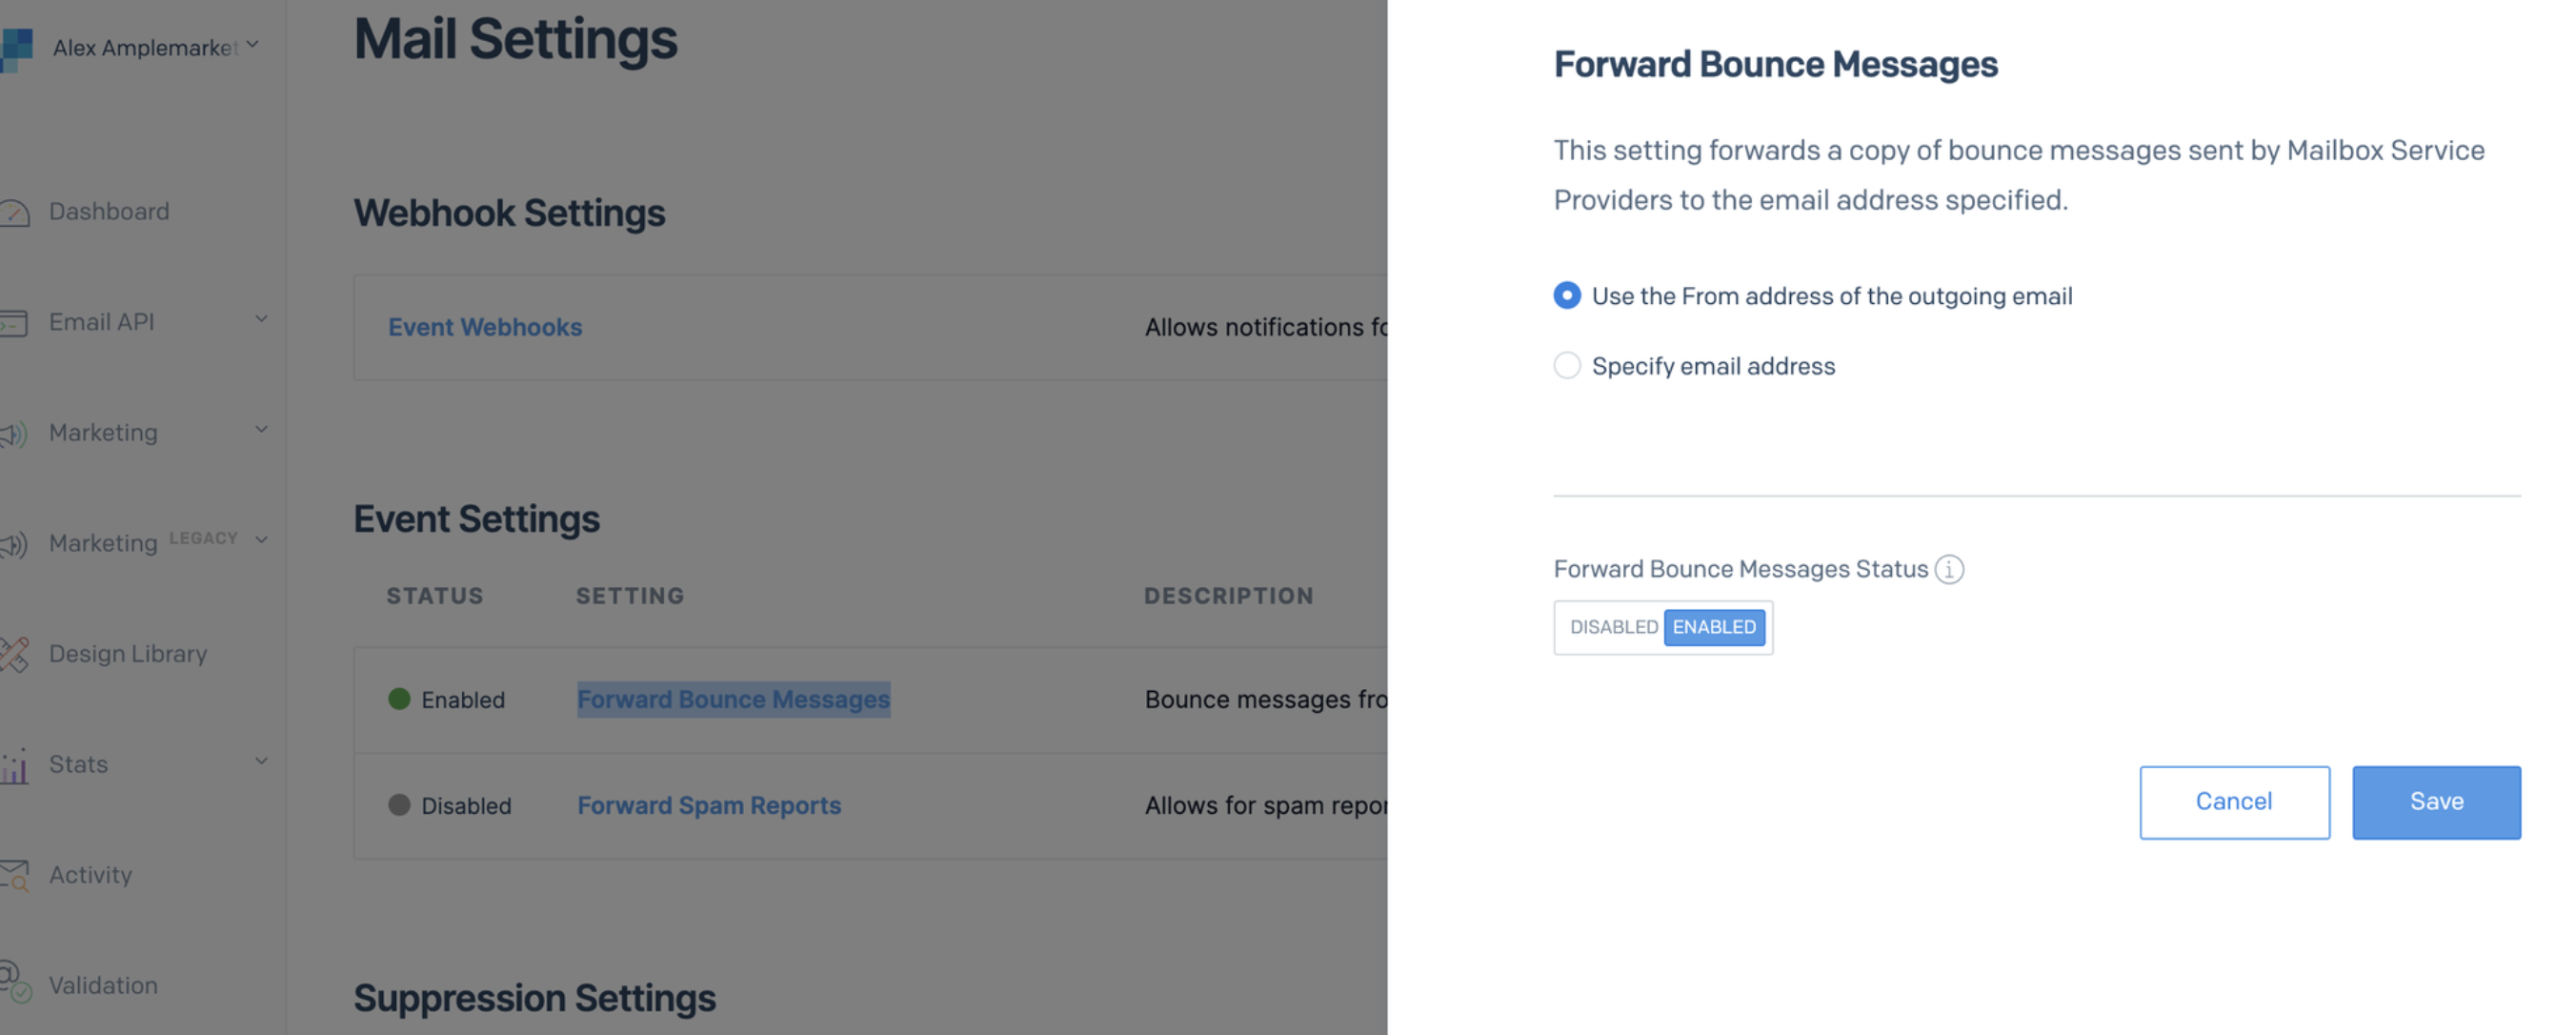
3) Enable Bounce Detection
This will allow Amplemarket to continue to detect bounced emails.
Go to Mail settings > Event Settings
Enable “Forward Bounce Messages”
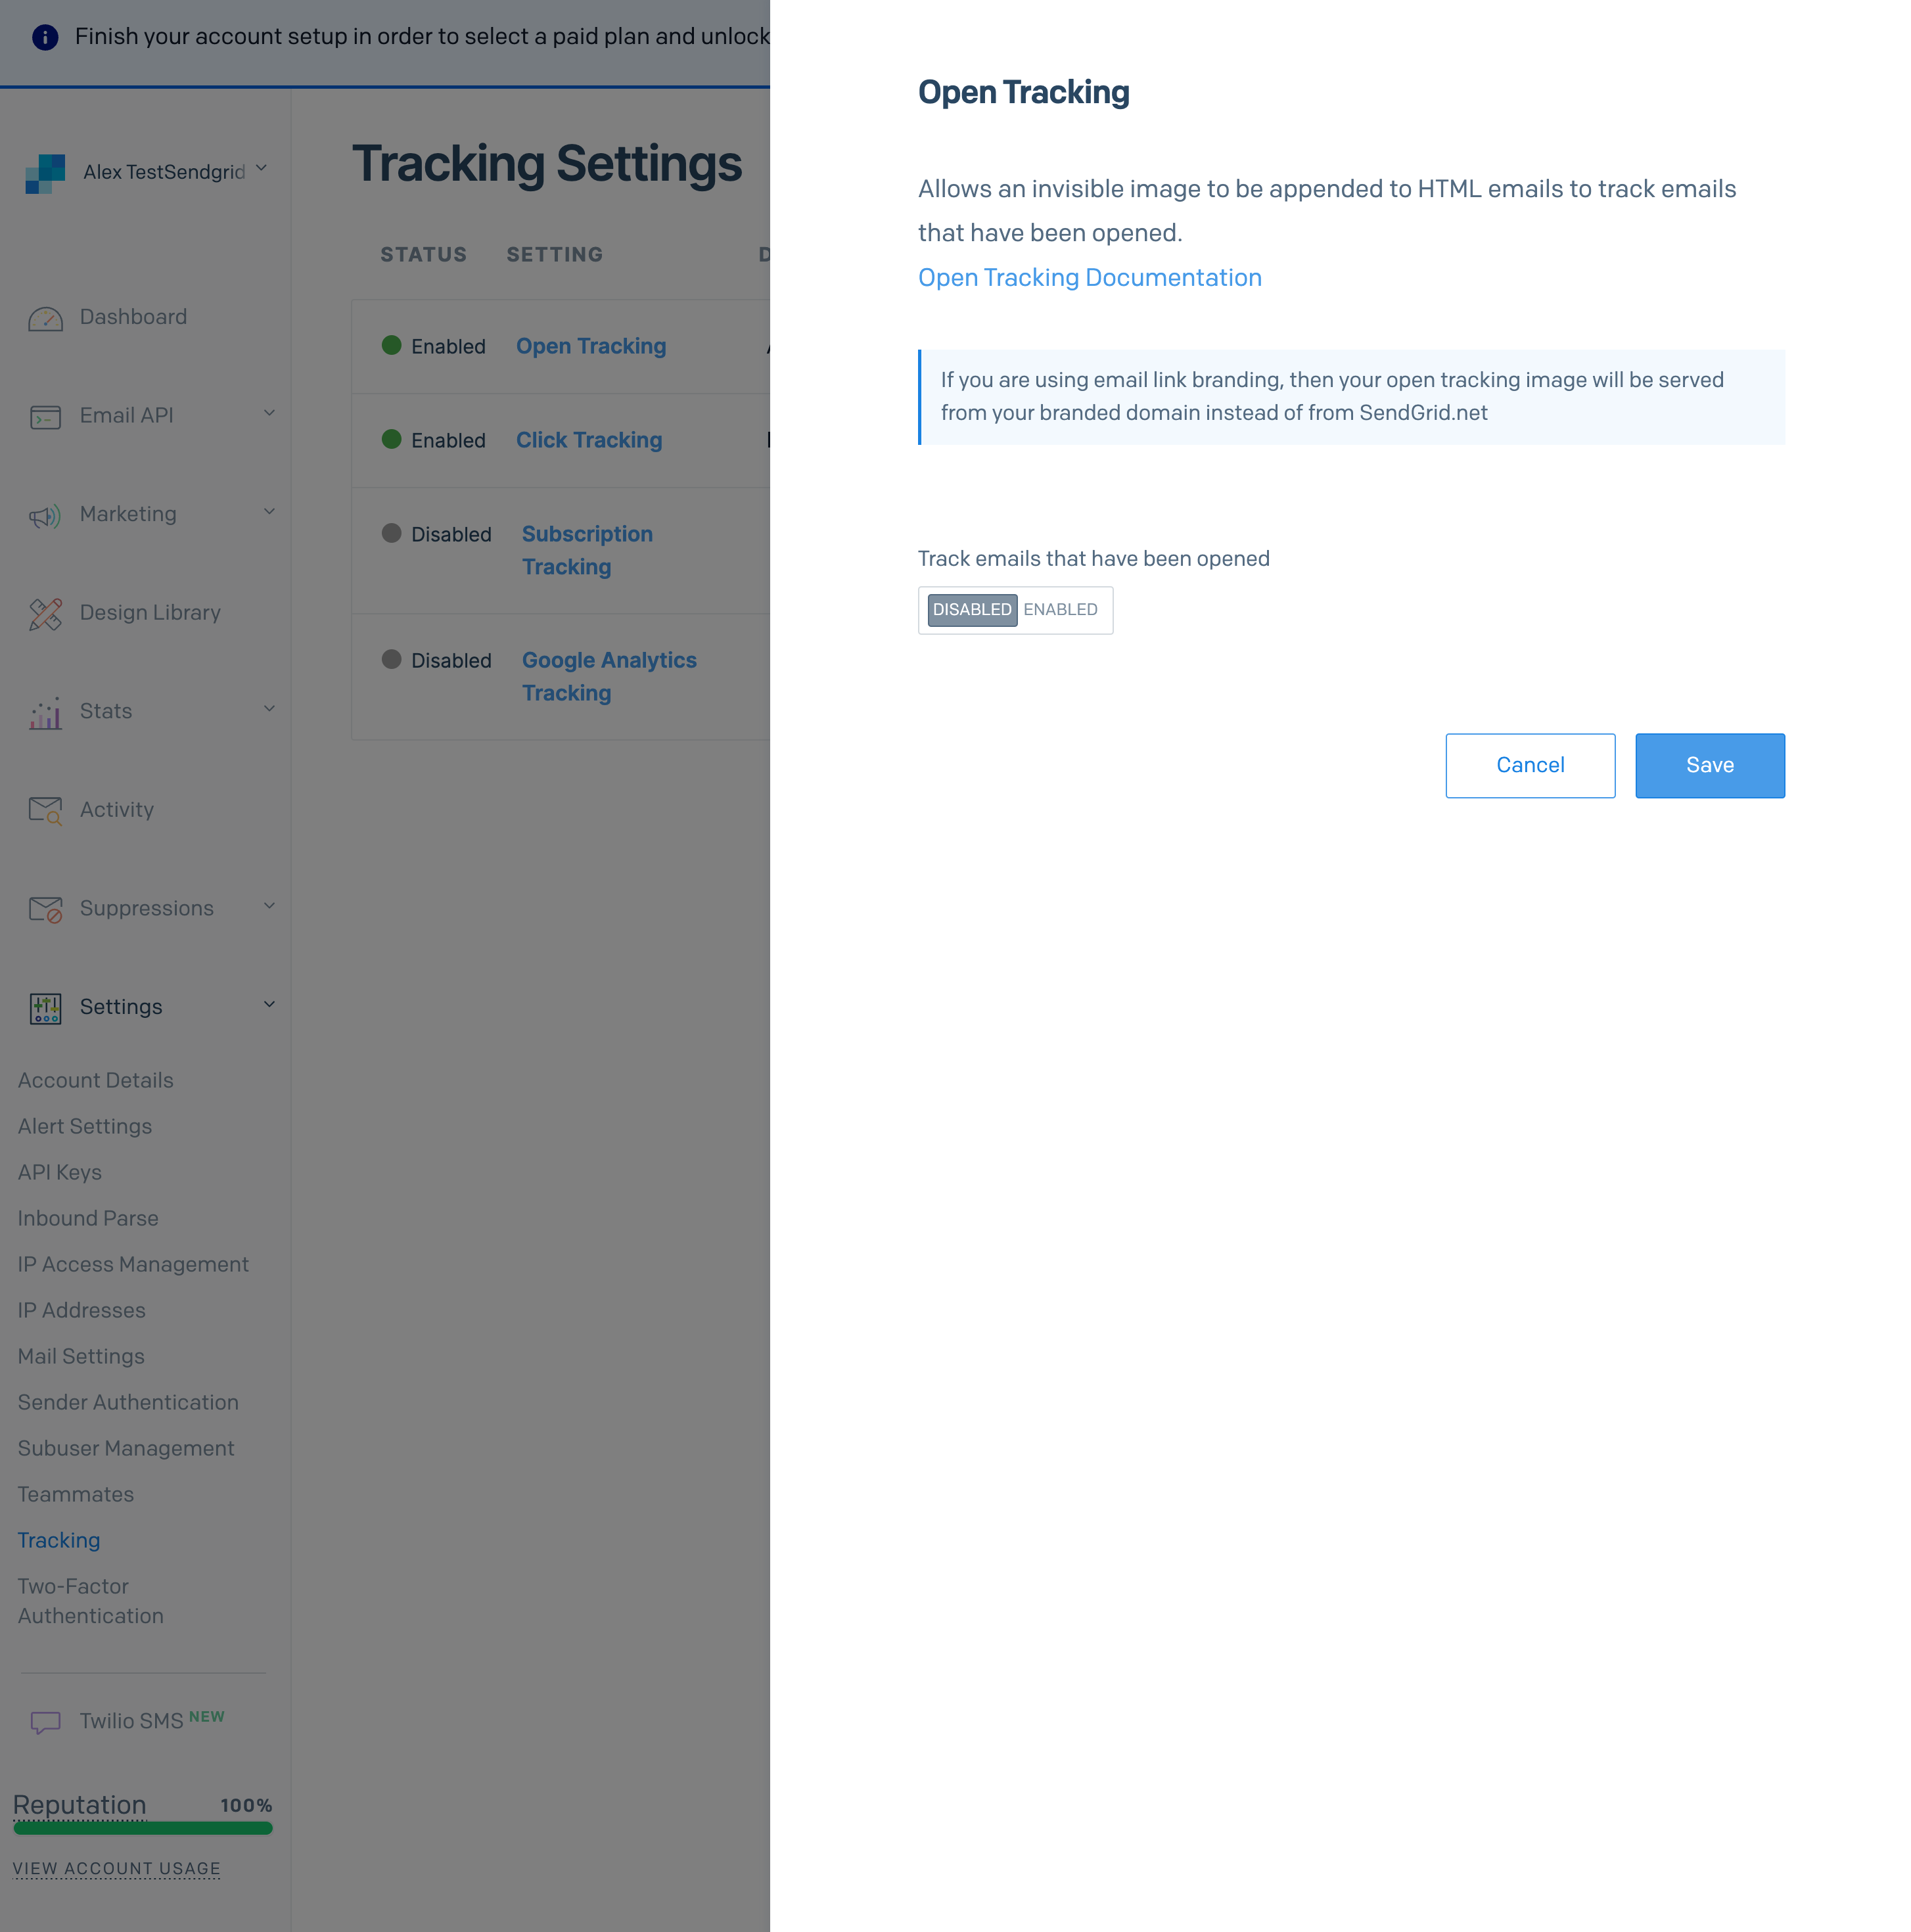
4) Turn off Sendgrid's Tracking


5) Link your Amplemarket’s Mailboxes to your SendGrid account
In this step we’ll finally enable your Mailboxes to send email using Amplemarket's SendGrid as your custom SMTP.
The first step is to generate a SendGrid API Key.
You can generate one API Key and use it for all your mailboxes:
Go to Settings > API Keys > Create API Key.
On the API Key Name, put the identification for this API Key, could be anything (e.g amplemarket-smtp)
Select “Full Access”, and click “Create & View”
Copy and save this API Key; you won't be able to see it again! ⚠
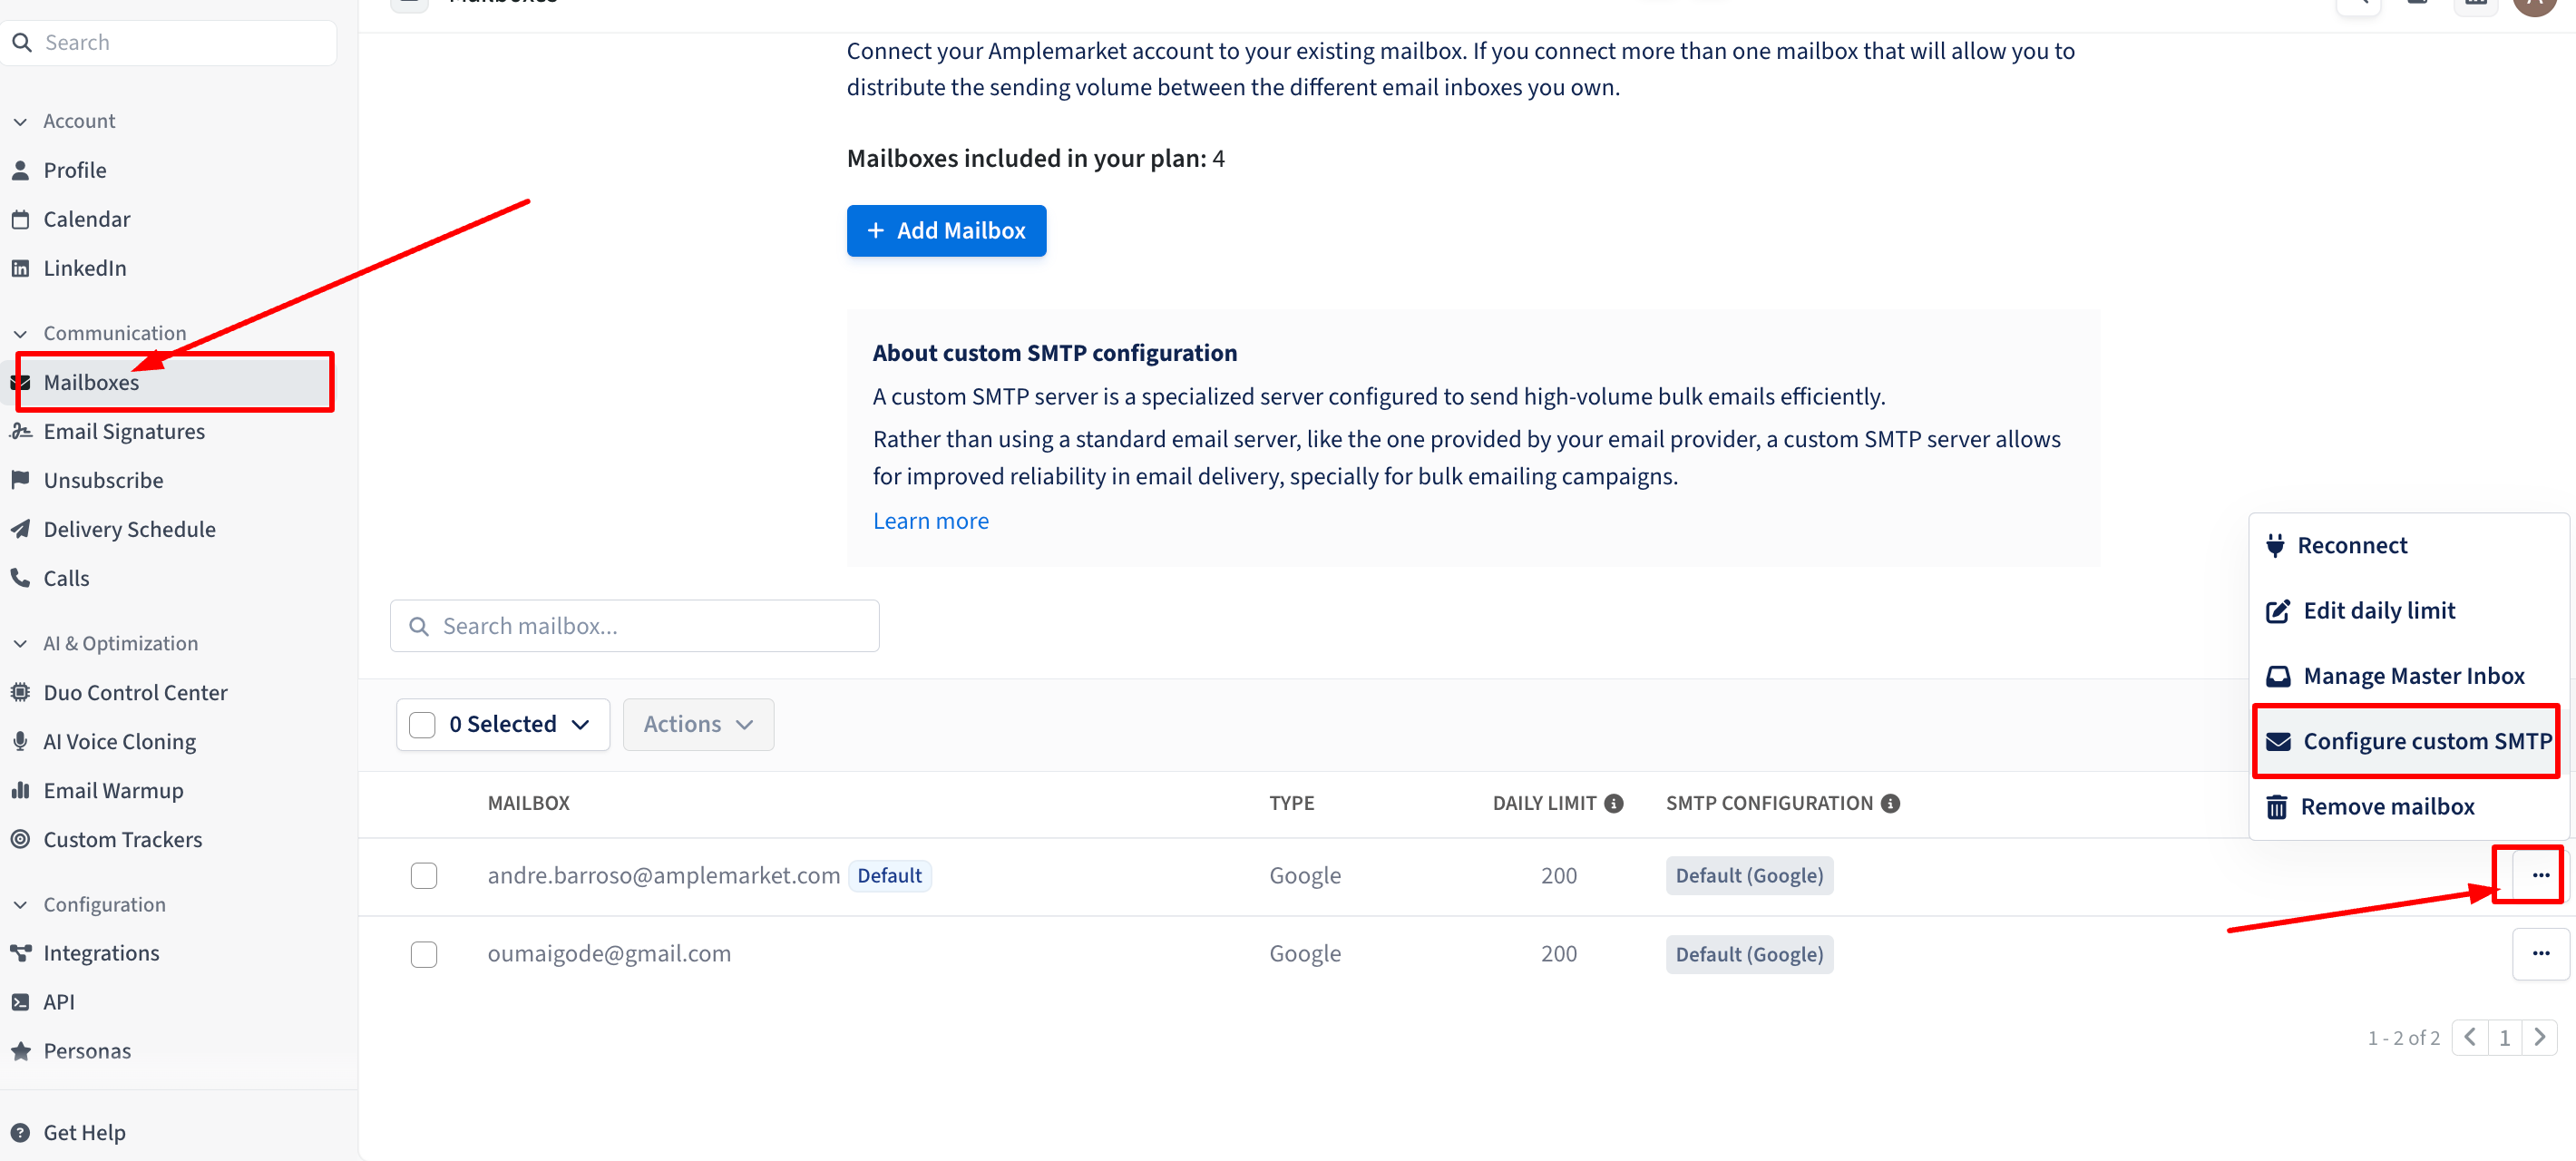
Now that you have an API Key, you can connect a Mailbox to SendGrid, you must repeat this step for each mailbox you want to connect:
Go to Amplemarket > Settings > Mailboxes > click on the “…” in the mailbox that you want to use the SendGrid SMTP
Click on : Configure custom SMTP
Fill out the SMTP settings form:
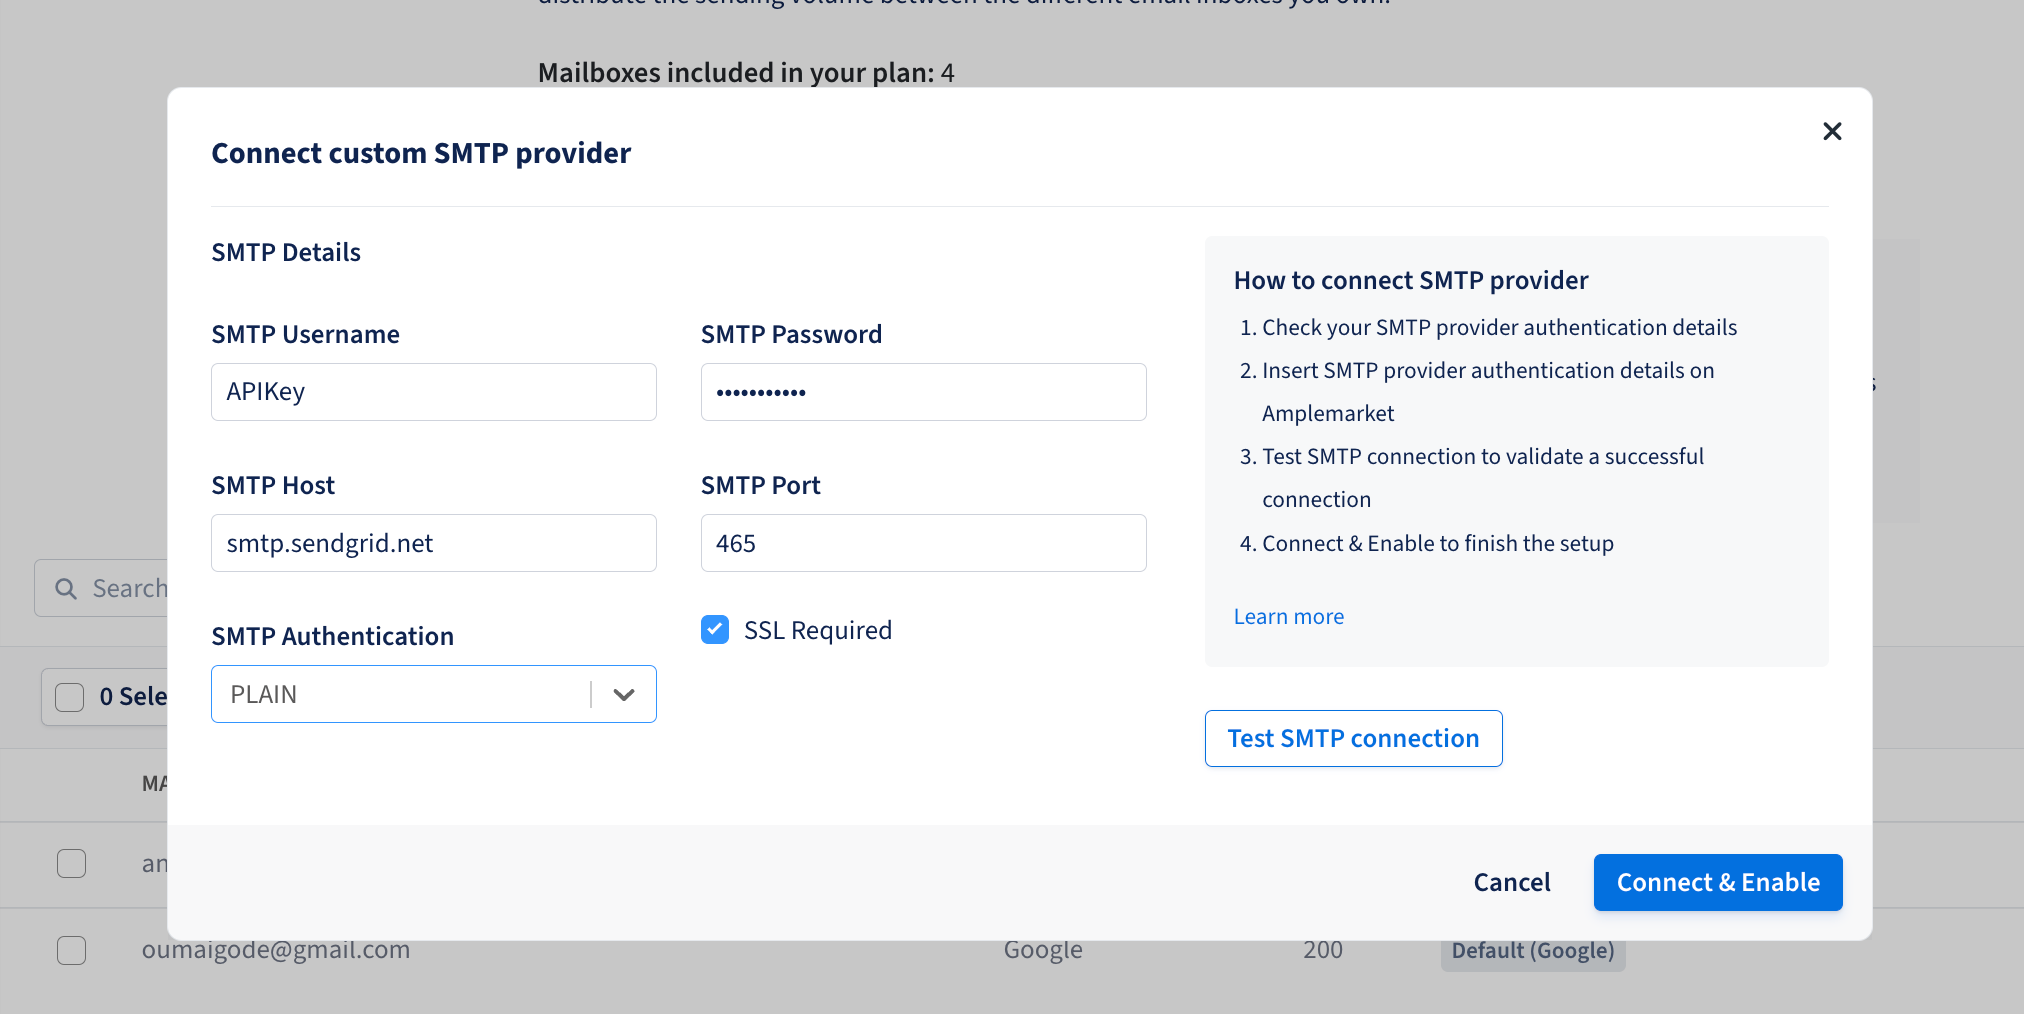
SMTP Username: apikey
SMTP Password: the API Key that you generate in the last step
SMTP Host: smtp.sendgrid.net
SMTP Port: 465
SMTP Authentication: PLAIN
SSL Required: checked
Click on “Connect & Enable”, and it should succeed.
The mailbox is now connected and ready to outbound.
Email open tracking compliance: Depending on the purpose and applicable legal basis, prior recipient consent may be required. Review your practices, obtain consent where required, and disable open tracking when you do not have an appropriate legal basis. See About Custom Trackers for details and regulator guidance.